Google SAML
How to use Google Workspace SAML identity provider with Kimai
Go back to general SAML configuration for Kimai.
SAML authentication with Keycloak accounts has proven to work with the following configurations.
Group sync
If you want to sync user-roles as well, you have to know that Google has two different ways to do that. You can either use Google Groups or additional user attributes. We strongly recommend to use Google Groups, but you can create an additional multi-value user attribute as well. Both are described below in the Step-by-Step guide.
Configuration
Please copy & paste the entire SAML configuration. Adjust the following keys with your Google / App specific settings:
kimai:
    saml:
        provider: google
        activate: true
        title: Login with Google
        mapping:
            - { saml: $Email, kimai: email }
            - { saml: $FirstName $LastName, kimai: alias }
            - { saml: $Title, kimai: title }
            - { saml: $AccountNumber, kimai: accountNumber }
        roles:
            resetOnLogin: true
            attribute: Groups
            mapping:
                - { saml: KIMAI ADMIN, kimai: ROLE_ADMIN }
                - { saml: KIMAI TEAMLEAD, kimai: ROLE_TEAMLEAD }
        connection:
            idp:
                entityId: 'https://accounts.google.com/o/saml2?idpid=your-google-id'
                singleSignOnService:
                    url: 'https://accounts.google.com/o/saml2/idp?idpid=your-google-id'
                x509cert: 'ADD YOUR CERTIFICATE HERE'
            # Your Kimai: replace https://www.example.com with your base URL
            sp:
                entityId: 'https://www.example.com/auth/saml/metadata'
                assertionConsumerService:
                    url: 'https://www.example.com/auth/saml/acs'
You have to adjust more keys, please read the main SAML configuration!
Create and configure the SAML application
- Go to https://admin.google.com/ac/apps/unified
- Choose “Add app” followed by “Add custom SAML app”
- Choose your app name (e.g. “Kimai”) and add this image
- Copy & paste the values from the Google Step-by-Step (page 2) guide into your Kimai configuration:
SSO-URLintoSingle Sign-On URLEntity-IDintoEntity IDCertificateintoX.509 Certificate
- Configure and copy the Service Provider (
kimai.saml.connection.sp) values to Google (page 3):connection.sp.assertionConsumerService.urlintoACS-URLconnection.sp.entityIdintoEntity-ID- Choose the
Name-ID Format: “X509_SUBJECT” - Select the
Name-ID: “Basic Information > Primary Email” - On page 4
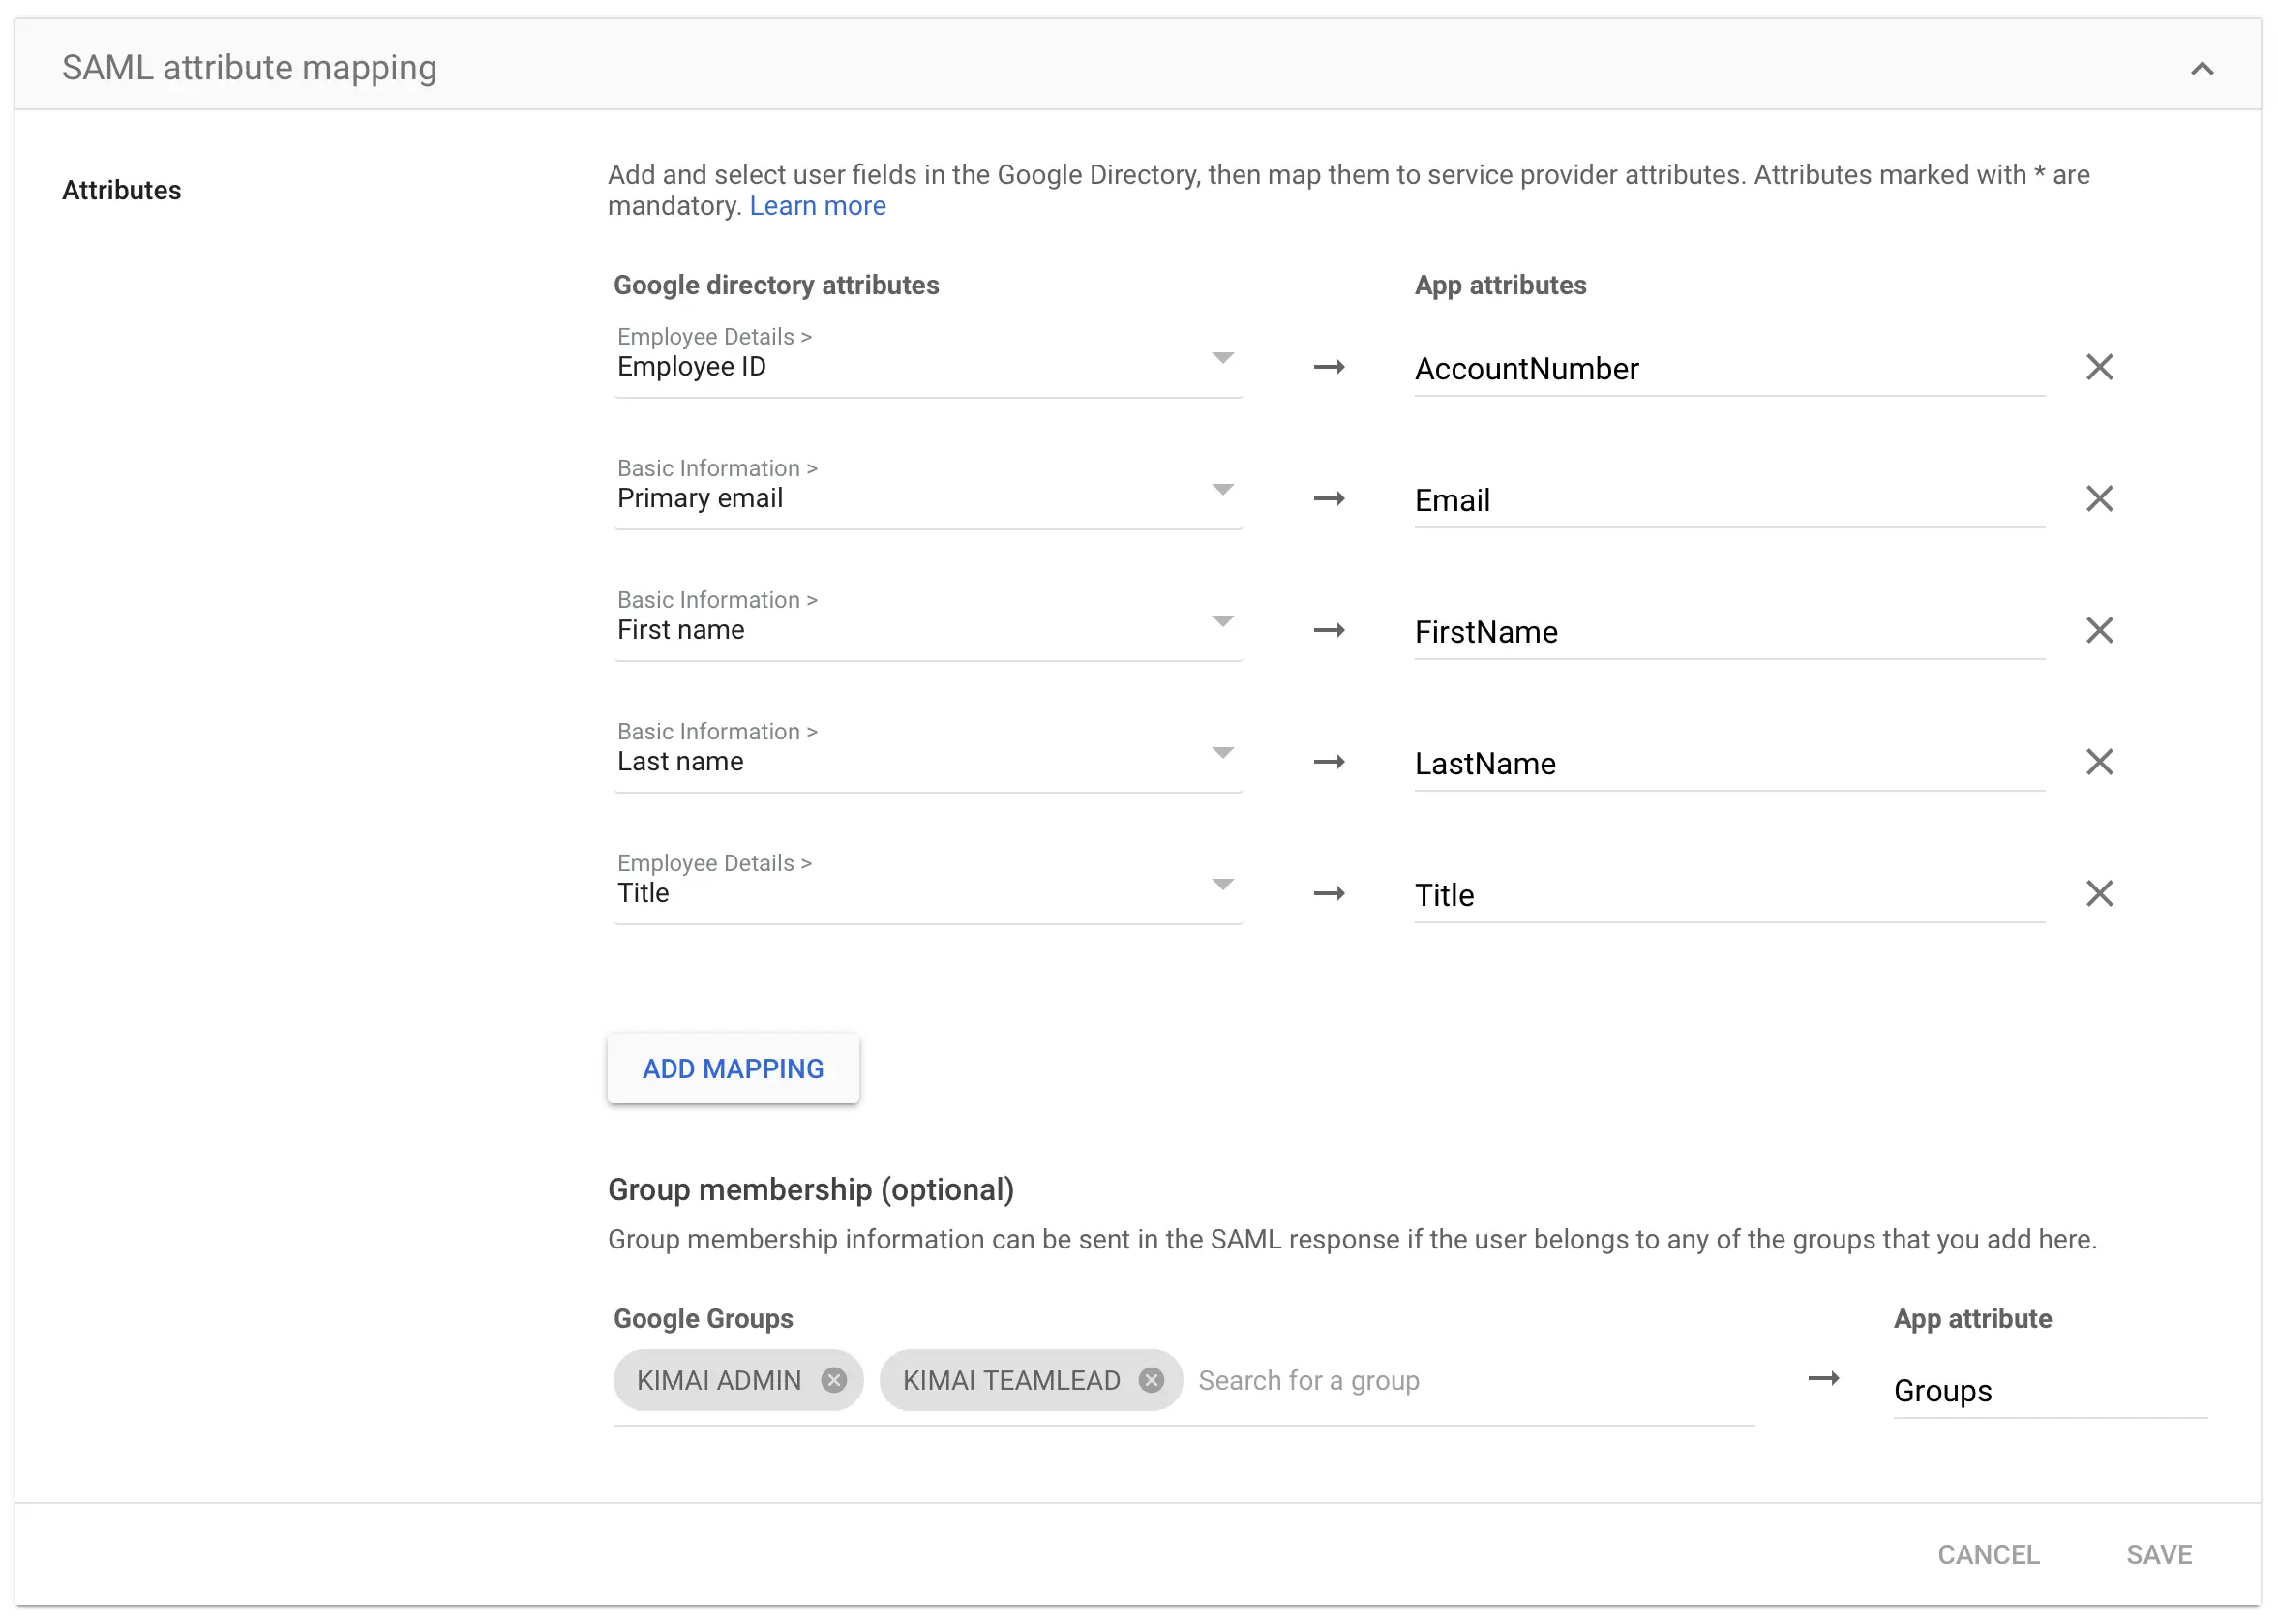
Attributesyou have to define theUser attributemapping like this (correct case is important):
Google directory attribute App attribute Basic Information > Primary email Email Basic Information > First name FirstName Basic Information > Last name LastName Employee Details > Employee ID AccountNumber Employee Details > Title Title - Back on the overview page: activate the new application for your users
- The last configuration step takes care of the
User rolemapping, which can be defined in two ways:- Using Google Groups (recommended):
- Create Groups for the Kimai roles you want to apply under Directory > Groups
- Apply these groups to your users
- Go back to edit your SAML application and configure the optional group-membership:
- Choose all groups you configured for Kimai and map them to the App-Attribute
Groups
- Choose all groups you configured for Kimai and map them to the App-Attribute
- Using a custom attribute:
- Create a User defined attribute called
SAML Group - Add a field
KimaiRoleas text type with multi-value - Edit your users and apply the values within the new attribute:
- The value
Kimai-Systemmaps to the Kimai roleSystem-Admin - The value
Kimai-Adminmaps to the Kimai roleAdministrator - The value
Kimai-Teamleadmaps to the Kimai roleTeamlead
- The value
- Go back to edit your SAML application and configure one more attribute mapping:
- The Google directory attribute
SAML Group > KimaiRoleto the App-AttributeGroups
- The Google directory attribute
- Create a User defined attribute called
- Using Google Groups (recommended):
You can use other names for your groups, the mapping happens in the next step in your Cloud configuration.
This screenshot is a showcase of the attribute mapping including groups:

Single Logout
Google does not support single logout, so it needs to be commented in the configuration.
The “single logout” feature was not yet tested, if you want to help, please let me know!